How To Clean Your Vape Tank
Par un écrivain mystérieux
Description
Cleaning your vape tank can often be thought of as a time-consuming and arduous process as well as quite tricky with the number of components that need to be disassembled and then reassembled again. However, simply put, a clean vape tank will deliver the maximum performance and flavour possible.
UK retailer of vape eliquids and vape kits.
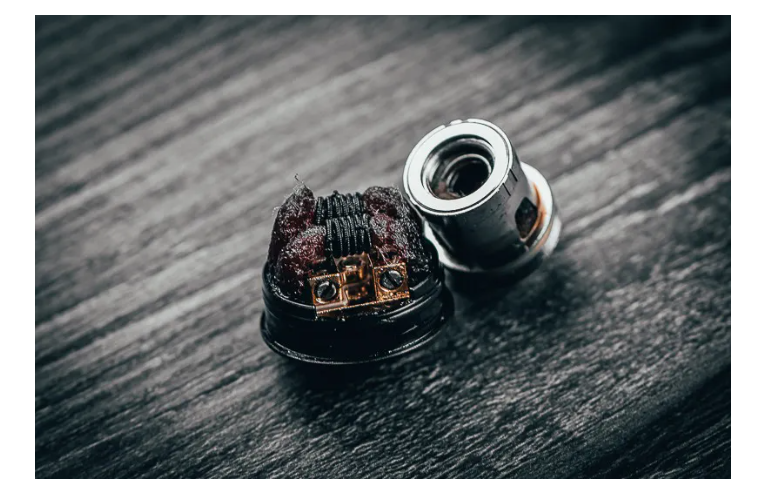
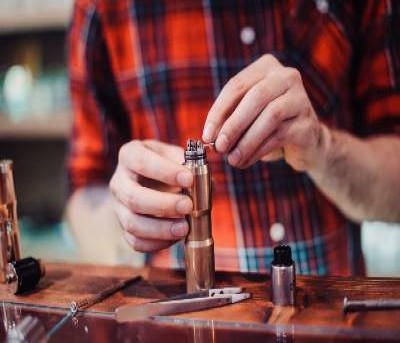
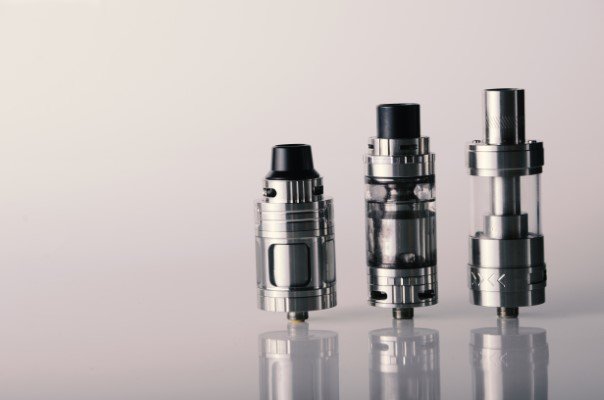
Cleaning your vape tank can often be thought of as a time-consuming and arduous process as well as quite tricky with the number of components that need to be disassembled and then reassembled again. However, simply put, a clean vape tank will deliver the maximum performance and flavour possible. Naturally over time, residue from e-liquid and dust will gather which can affect your vape so it’s important to stay on top of this. We recommend every fortnight or so to clean your vape tank and once you’re in the habit, you’ll find it's easy to stay on top of. It’s also easier to clean your tank whilst changing your coils as you’re in the process of disassembling your tank whilst also delivering the clearest and cleanest flavour possible. Strictly speaking, if you were to clean your tank with professional equipment in the most thorough way possible and willing to invest, you’d need an ultrasonic cleaner, cleaning agent and a lint-free (fibreless) cloth. However, as most of us don’t have access to such equipment, here’s our everyday handy guide to keep your tank in the best possible condition for the ultimate vape: Before cleaning, empty your tank and remove any excess e-liquid. Take your tank apart, separating all the individual parts out and remembering how the tank is assembled (it’s recommended to make notes the first few times you do this ). Remove the glass, if possible. Give each individual part a good rinse with warm water or leave all components to soak in water for 10 minutes. It is essential to not use soap. Dry each part carefully and thoroughly with a soft cloth, leaving all parts to air dry until all moisture is completely evaporated. Do not refill or use your tank if it still has water in it. Once you’ve affirmed that every part is dry, reassemble your tank appropriately and carefully. Ensure everything is back in its correct place, including O-rings which need to be checked are in good condition to seal off e-liquid from leaking. Refill your tank with e-liquid, wait for it saturate (5-10 minutes should do) and start vaping. Check out our video on how to deep clean your vape tank to coincide with this guide. If you have any other queries relating to cleaning your tank or vaping in general, please do not hesitate to get in touch with us . How To Guides & Useful Information Vape TANK Guides Learn More About Vape Tanks ➲ How To Vape Guides Learn More ➲
UK retailer of vape eliquids and vape kits.
Cleaning your vape tank can often be thought of as a time-consuming and arduous process as well as quite tricky with the number of components that need to be disassembled and then reassembled again. However, simply put, a clean vape tank will deliver the maximum performance and flavour possible. Naturally over time, residue from e-liquid and dust will gather which can affect your vape so it’s important to stay on top of this. We recommend every fortnight or so to clean your vape tank and once you’re in the habit, you’ll find it's easy to stay on top of. It’s also easier to clean your tank whilst changing your coils as you’re in the process of disassembling your tank whilst also delivering the clearest and cleanest flavour possible. Strictly speaking, if you were to clean your tank with professional equipment in the most thorough way possible and willing to invest, you’d need an ultrasonic cleaner, cleaning agent and a lint-free (fibreless) cloth. However, as most of us don’t have access to such equipment, here’s our everyday handy guide to keep your tank in the best possible condition for the ultimate vape: Before cleaning, empty your tank and remove any excess e-liquid. Take your tank apart, separating all the individual parts out and remembering how the tank is assembled (it’s recommended to make notes the first few times you do this ). Remove the glass, if possible. Give each individual part a good rinse with warm water or leave all components to soak in water for 10 minutes. It is essential to not use soap. Dry each part carefully and thoroughly with a soft cloth, leaving all parts to air dry until all moisture is completely evaporated. Do not refill or use your tank if it still has water in it. Once you’ve affirmed that every part is dry, reassemble your tank appropriately and carefully. Ensure everything is back in its correct place, including O-rings which need to be checked are in good condition to seal off e-liquid from leaking. Refill your tank with e-liquid, wait for it saturate (5-10 minutes should do) and start vaping. Check out our video on how to deep clean your vape tank to coincide with this guide. If you have any other queries relating to cleaning your tank or vaping in general, please do not hesitate to get in touch with us . How To Guides & Useful Information Vape TANK Guides Learn More About Vape Tanks ➲ How To Vape Guides Learn More ➲

Maximize Vape Coil Life: Essential Maintenance & Quick Fixes!

How to Clean a Vape Device Properly
Guide to Cleaning Your Vape

How to Clean Your Vape Tanks and Coils - Vaping360
How to Clean Your Vape Coil and Tank

How to Fill a Vape Tank

How to Clean Vape Coil - Firefly Vapor
How to Clean Your Vape Device & E-Cig
How To Clean Your Vape Mod
depuis
par adulte (le prix varie selon la taille du groupe)